Client Javascript
Configuration Dialog
Configuring
a Javascript file from the workspace (internal)
Configuring
an external Javascript file
See also: Working With Web Resources, Rich Client Features
Introduction
This dialog allows existing client Javascript files to be associated with a page, form or presentation template. It supports both Javascript defined within the workspace (internal) and external Javascript files which are loaded via a URL.
At runtime, Javascript files must be associated with a page in order to be used. The Javascript files can be associated with an individual page directly, with a form (i.e. all pages within that form), and with a presentation template (i.e. all pages within all forms that use that template). A form inherits any Javascript file associations from the presentation template (if the form is linked to one) and a page in turn inherits all the Javascript file associations from its owning form. At each level, it is possible to disable Javascript files specified at higher levels.
This dialog is available in the Web Resources Section for each of these entities. Its job is to allow Javascript files to be added, and to manage any inherited associations.
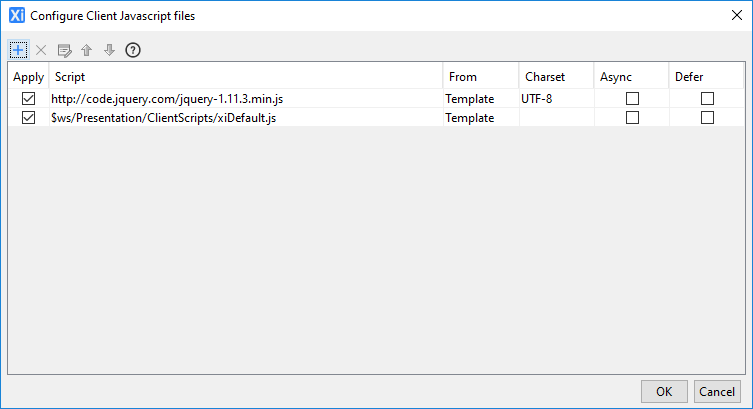
Only those Javascript file associations which apply to the entity which opens the dialog are shown. The picture above shows the dialog opened from Page Properties, so page, form and template associations will be shown (though only page and template associations exist in this example). When opened via Form Properties, only Javascript files for that form and any inherited from a template would be shown. Presentation Template cannot inherit from anywhere else so only Javascript files associated with it will be shown.
Javascript files are included in a web page using <script> tags. These tags are generated in the order that the Javascript files appear in this dialog. They can be moved up or down by clicking on the appropriate buttons, but are always ordered in the following way: presentation template scripts, then form scripts, then page scripts. The ordering of inherited Javascript files cannot be changed. The relative order of Javascript files is important as functions and code declared in one script can only use code and functions declared in scripts that come before it.
|
Property |
Description |
|
Apply |
Click this checkbox to indicate that the Javascript file should be applied. If a Javascript file association is disabled (not applied) then it will not be inherited. |
|
Script |
Path to the script file – this is read only. Double click on this name to edit the configuration – this is only possible when the script is configured at this level. Internal Javascript files are shown with a path beginning with $ws and this indicates to the system that this Javascript file is to be loaded from the workspace. |
|
From |
Shows the level at which the Javascript file was configured, and is for information only. Javascript files inherited from higher levels can be disabled by unchecking the Apply checkbox but they cannot be removed. |
|
Charset |
The character encoding used in this script: usually ISO-8859-1 or UTF-8. |
|
Async |
Causes the Javascript file to be loaded with the async attribute. The script is executed asynchronously with the rest of the page. See standard HTML documentation for more information. |
|
Defer |
Causes the Javascript file to be loaded with the defer attribute. The script is executed when the page has finished parsing. See standard HTML documentation for more information. |
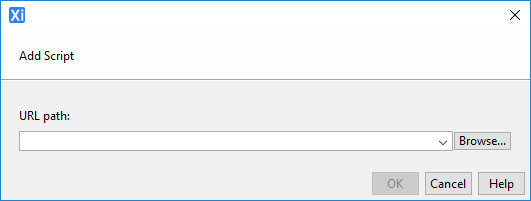
Add Javascript File
Javascript files can be added from within the workspace
(internal) or externally via a URL. Click the ![]() icon to add a new Javascript file which shows
this dialog:
icon to add a new Javascript file which shows
this dialog:
Configuring a Javascript file from the workspace (internal)
Click the Browse.. button then select the Configure from workspace tab to show the Workspace Browser which will show all available Javascript files.
Configuring an external Javascript file
A URL can be either of the following (see URL Formats):
- absolute when it starts with a protocol or “//” e.g. http://www.mydomain.somejavascript.js or //ajax.googleapis.com/ajax/libs/jquery/1.10.1/jquery.min.js. Absolute URLs can only be configured by typing the URL into the URL path edit box.
- relative when it doesn’t start with a protocol or “//”, and is then treated as being relative to the root of the server web application (e.g. css/somejavascript.js). To use a relative URL, click the Browse.. button then select the Configure from Server tab to browse the server’s file system. You can also enter a relative URL directly in the URL path edit box.