Studio Preferences
The Studio
Preferences dialog is accessed from the main studio menu File ->
Preferences and sets options and default values used throughout the studio
application. It has the following tabs:
General Tab
Studio Instance Name: this name is displayed in the title bar at the top of the studio window and is used to prefix some of the studio preferences files saved in the properties folder. If you have multiple studio applications, this is a good way to distinguish between them.
Preferred Language Id: the default language used for the studio.
This is the default language used for creating all texts and is also the
default language used for form submission from the studio.
Preferred Script
Language: sets the preferred server-side
scripting language.
Date Literal Format: the format that date literals are
entered in the studio. This format applies to date literals entered as field
default values or as URL parameters when testing forms. This parameter should
have the same value as the Date Literal
Format server property.
Browsers: supports the configuration of any number of
browser clients. The browser can be selected when a form is run when the
following option Display options panel
when launching forms is checked.
Display options panel when
launching forms: when checked, the
system will present an additional panel when submitting forms from the studio;
this panel supports the specification runtime language and browser.
Show Getting Started page at startup: Shows the Resource Hub home page each time the studio is started.
Report unexpected errors: when checked, any errors in the studio will result in a popup window as shown below:
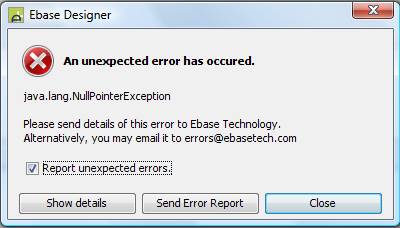
Click Show details to display the error.
Click Send Error Report to send the error to Ebase. Note that this requires internet access.
Uncheck Report unexpected errors to suppress display of this dialog. Check this option if this dialog is showing repeatedly.
Folders excluded from the workspace: any folders with these names are ignored inside the workspace. The default is .svn, .cvs, .git. The corresponding server property should also be configured with the same values Server Admin App – Workspace Properties.
UI Options Tab
Look and feel : sets the look and file for the
entire studio. The list of options shown depends to some extent on the version
of Java used, but may include
|
default |
System supplied look and feel
(from Jgoodies) |
|
Metal |
Java default look and feel |
|
Nimbus |
Nimbus look and feel introduced
with Java 6 |
|
CDE/Motif |
Look and feel compatible with XWindows |
|
Windows |
Windows compatible look and feel |
|
Windows Classic |
Windows Classic compatible look
and feel (this option may not be visible depending on OS) |
Override default fonts: enables font name and size to be entered below.
Name: the font used by the studio
Size: the font size used by the studio
Tooltip timing parameters:
Initial delay time (ms): the number of milliseconds to delay (after the
cursor has paused) before displaying the tooltip.
Dismiss time (ms): the number of milliseconds to delay before taking away a tooltip.
Reshow
time (ms): the number of
milliseconds before the user has to wait initialDelay milliseconds before a tooltip will be shown.
That is, if the tooltip is hidden, and the user moves
into a region of the same Component that has a valid tooltip
within the reshowDelay number of milliseconds the tooltip will immediately be shown. Otherwise, if the user
moves into a region with a valid tooltip after the reshowDelay number of milliseconds, the user will
have to wait an additional initialDelay milliseconds before the tooltip is shown
again.
Script Dialog Font: the font name and size of the font
used by the script editor
Debug Window Font: the font name and size of the font
used to display the form execution log
Form Options Tab
New Form Defaults: sets default values for form options
specified in form properties.
Html Document Type: see Html Document Type in Form
Properties
Use Project Theme: if selected then newly created forms will
use the Project’s Theme as default. If not selected the configured default template will be used.
Default
Presentation Template: the
default template linked to all new forms and components. In addition, the
project containing this template is automatically linked with all new projects.
Html Form Tag Position: see Html Form Tag Position in Form
Properties
Browser Back Button Support: see Browser Back Button Support in
Form Properties
Use
PDF Printing
Printing
Options
PDF Engine: Select
the PDF Engine used to print out the PDF document. By selecting this it
changes the print view between wkhtmltopdf and flying
saucer view. The flying saucer PDF engine is legacy and support HTML4 and CSS2.
This property only changes studio view and does not change the server runtime PDF engine.
Legacy Print
Form Defaults: these options provide
defaults that apply only to the use of legacy
print forms.
Page
orientation: the page
orientation used for all newly created print forms. This can be overridden at
the individual print form level or at the print page level.
Page size: the page size used for all newly created print forms. This can be overridden at the individual print form level or at the print page level.
Page Editor Tab
Edit the zoom options displayed in the Form Editor WYSIWYG View.
·
To add a new entry, click the ![]() button.
button.
·
To delete an entry, select it then click the ![]() button.
button.
· To edit an existing entry, double click on it.
Entries must be numeric and end with %.
Screen Resolutions
Edit the available screen resolutions and give a meaningful device name. These are displayed in the Form Editor WYSIWYG View.
·
To add a new entry, click the ![]() button.
button.
·
To delete an entry, select it then click the ![]() button.
button.
·
To edit an existing entry, either click the ![]() icon or double click on it.
icon or double click on it.
When editing or adding a new entry the properties are as follows:
Name: The name of the device
Width: Screen width
Height: Screen height
User Agent: The user agent string for the
device. For example iPhone X - Mozilla/5.0 (iPhone; CPU iPhone OS 11_0 like
Mac OS X) AppleWebKit/604.1.38 (KHTML, like Gecko) Version/11.0 Mobile/15A372
Safari/604.1.This
can be null.
Show device: whether to show the device in the Form Editor WYSIWYG View.
Devices in the list
that are shown in bold font cannot be edited or removed.
To show or hide a
device from the Form Editor WYSIWYG View
then select the Show Device checkbox in the devices table.
Add following controls
to new pages
Select any controls that should be automatically added to new form
pages:
·
Page Panel Control – contains page level header
and trailer texts.
·
Page Navigation Panel Control –
contains legacy page sequencing buttons and save restore buttons
Compatibility note!: adding both these controls provides equivalent functionality to Ebase Version 3.4 and earlier.
Control Options Tab
When adding a control to a page:
Link to the
Presentation Template’s default Property Set: when this option is checked, each new control
added to a page will be automatically linked
to the control’s default Property Set, if specified, in the Presentation
Template. When this option is not checked, the default Property Set, if
specified is loaded. See Property Sets for more information on linking vs.
loading.
Components:
Enable Property Set
linking: when this
option is checked, controls within components can be styled by linking them
with a Property Set in the associated Presentation Template. When the component
is inserted/deployed to a form, the linkage to the Property Set is maintained:
the developer should ensure that a Property Set with the same name is available
in the form environment or any styling will be lost. When this option is not
checked, the linking option is not available when designing a component. See Property Sets for more information on linking vs.
loading.
Palette:
Hide Legacy Controls: when this option is checked, controls
marked as legacy controls are hidden from the Palette
View in the Form Editor. Legacy controls will
not be hidden if they are already
added to a Page or Component regardless of this setting. Legacy controls are controls
that no longer applicable to modern web applications, for instance, a Navigation
Panel Control.
Proxy Options Tab
This tab allows specification of a proxy server to be used for all Http connections made from the Studio. This includes connection to the Verj.io server and the import of wsdl and xsd files in the Web Services and XML resource respectively. The corresponding proxy settings for the Verj.io Server are configured using server properties Proxy Settings.
Host: host name or ip
address of the proxy server
Port: port of the proxy server (defaults to 80 if
not specified)
Proxy: requires authentication: check this to enable
the username and password fields
Username: user name for proxy authentication
Password/Confirm password: password for proxy authentication
Non proxy hosts: hostname or ip
address of any servers which should not
be routed through the proxy, multiple hostnames/ip
addresses should be separated by a | character. When a proxy has been
configured but the studio is using a test server on the same host, it may be
necessary to enter ”localhost|127.0.0.1” in this field to exclude localhost from the proxy. If configured, this property
overrides any –Dhttp.nonProxyHosts
property on the Java command used to start the studio.
Workflow tab
Workflow Assignment Handler: this specifies the class name of
the implemented workflow assignment handler. In most cases this will be the default assignment handler
provided with the system com.ebasetech.ufs.xi.workflow.XIAssignmentHandler.
The assignment handler is used in the studio to display the Custom Assignment panel within the Resources tab of a workflow interactive
task’s properties.
The value specified here must match the configuration of server property
Assignment
Handler in the workflow.properties
file.
Click here
for more details on assignment handlers in general.
Workflow Security Handler: this specifies the class name of
the implemented workflow security handler. In most cases this will be the
default security handler provided with the system com.ebasetech.ufs.workflow.security.example EbaseSecurityHandler.
The security handler is used in the studio to display the the
Security tab of a workflow process or
node properties.
Two workflow security handlers are shipped with the distributed Verj.io
system and can be configured here:
·
com.ebasetech.ufs.workflow.security.example EbaseSecurityHandler: provides minimal security
checking– all users are allowed to create new workflow jobs and display a task
list without any security check. In addition if a workflow process or node does
not have a security expression configured, all other actions are also allowed.
·
com.ebasetech.ufs.workflow.security.example EbaseStrictSecurityHandler: provides a higher level of
security checking - all users are allowed to create new workflow jobs without
any security check, but all other actions require security authorization.
The value specified here must match the configuration of server property
Security Handler
in the workflow.properties
file.
Workflow Activity Types: this is a comma delimited list of
class names for supported workflow activity types. The default values should
not normally be changed. Any custom activity classes must also be added to the classpath of the server
Web Content tab
Editors: this associates web
resource file types for files within the workspace with the various editors
provided by the Verj.io system. If a file type is not found in this list, the
system will attempt to open it with the default text editor. Note that image
types do not need to be added to this list and image files will be opened using
the read only Image Displayer.
Servers tab
This tab allows you to configure all the
servers which the studio can connect or deploy to. Once configured, you can
select which server you want to use as the studio’s test server using the server selection dropdown in the top right of
the studio window. The test server is used as the default server for running
forms and testing web services and workflow processes. It’s also used when
debugging server-side Javascript scripts.
Privacy tab
Keep me logged into my cloud account: When checked, the system will
remember your authentication details to the Verj.io
Cloud Portal. These are saved in the cloud.conf file in the /Verjio/.Studio/properties folder in the user home file
system. Deleting this file will result in a re-prompt of the Verj.io Cloud Portal signon.
Debugger tab
This tab allows you to configure the interactive
script debugger options.
General:
Maximum value length: sets the maximum number of
characters retrieved from the server for each variable, field and table field
values. This is to limit the size of the characters returned from the serbrt for optimization and memory purposes. The default is
set to 100 characters.
Variables:
Maximum variables to show: sets the maximum number of variables retrieved from the server. The
default is set to 100 variables.
Show proto: when checked, prototype objects (displayed as _proto) are displayed for each object. The default is checked.
Show parent: when checked, parent objects (displayed as _parent) are displayed for each object. The default is checked.
Show functions: when checked, functions are displayed. The default is unchecked.
Show const: when
checked, any constants (defined with the const
keyword) are displayed. The
default is checked.
Tables:
Row limit: sets the maximum number of rows to
retrieve from the server. The default is set to 100 rows.
Column limit: sets the maximum number of columns
to retrieve from the server. The default is 20 columns.
Track current row: check this to track the current row
of the table. The current row is highlighted in yellow.